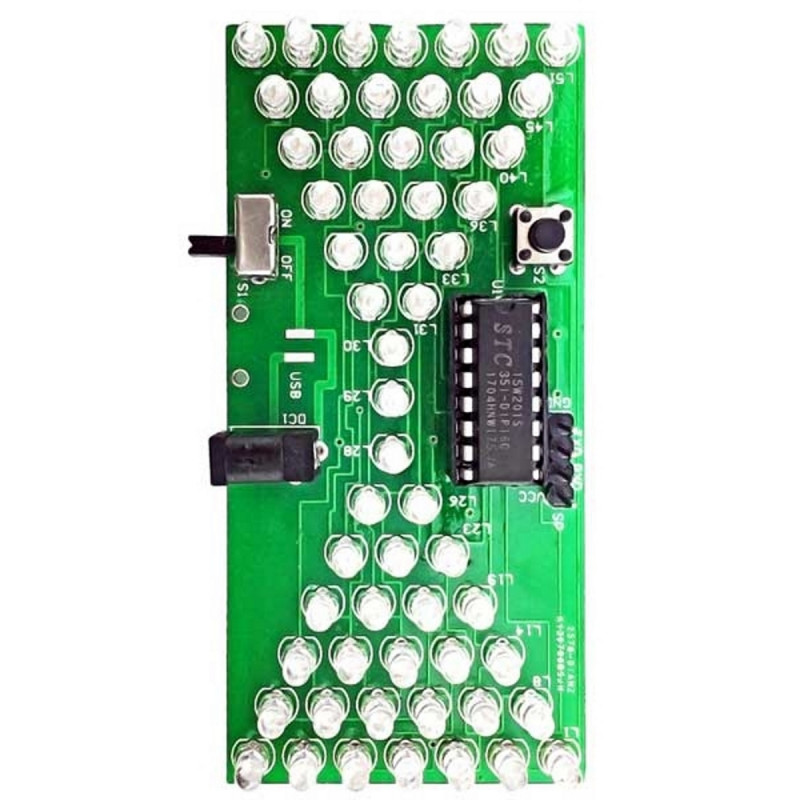


Electronic hourglass in kit consisting of 57 blue light LEDs. It scans the passage of time, simulating the flow of sand in a traditional hourglass, with the lighting of one LED at a time.
 Secure Payments
Pay safely with Credit Card, PayPal, Amazon Pay or Bank Transfer
 Fast Shipping
We ship across Europe and worldwide with UPS, DHL and DPD
 30-Day Easy Return
You have 30 days from delivery to return the product if you're not satisfied
Attention, the product is a KIT and therefore you will be given the components to be welded with an electronic soldering iron and everything you need to recreate the device as shown in the image. The KIT includes easy-to-understand illustrated instructions in English.
LEVEL ESPE experience lower middle NEEDED
Also available for assembly and testing by Mectronica STORE by adding 10 quantities of the KIT assembly service that can be purchased by clicking here on EB A Y | MECTRONICA STORE and adding it to the cart together with the KIT to be assembled.
Electronic hourglass in kit consisting of 57 blue light LEDs. It scans the passage of time, simulating the flow of sand in a traditional hourglass, with the lighting of one LED at a time. All managed by a microcontroller. A button allows, with each press, to increase or decrease the speed. Power supply: 5 VDC, dimensions (mm): 84x40x10.
Assembly and Use
In order to assemble the kit, it is advisable to proceed with the components having the least thickness, therefore proceed by assembling the plinth paying attention to the polarity. Then proceed with the slide switch, the button and then the LEDs. As for the LEDs, polarity is also very important in this case, so make sure it is correct, as if it is reversed, during operation, some LEDs may not light up correctly.
When assembly is complete, supply power (5Vdc) to the product via the DC1 connector (central positive), or by soldering two wires to the two pads located between the DC1 connector and the S1 diverter (keeping the DC1 connector on the right, the pad on the left is the positive, while the one on the right is negative). If the device does not switch on, check that you have placed the slide switch S1 in the ON position. Button S2 can be used to vary the passage of time.
Electronic hourglass kit consisting of 57 blue light LEDs. It marks the passage of time, simulating the flow of sand of a traditional hourglass, with the lighting of one LED at a time. All managed by a microcontroller. A button allows, each press, to increase or decrease the speed. Power supply: 5 VDC, dimensions (mm): 84x40x10.
Assembly and Use
In order to assemble the kit, it is advisable to proceed from the components with the least thickness, therefore proceed by mounting the base, paying attention to the polarity. Then proceed with the slide switch, the button and then the LEDs. As for the LEDs, polarity is also very important in this case, so make sure it is correct, as if it were reversed during operation, some LEDs may not light up correctly.
• L1 ÷ L57: 3 mm blue LED
• U1: 8 + 8 socket with STC15W201S on board
• S1: Slide switch
• S2: Microswitch
• DC1: Power plug
• ISP: 4-way male strip
After assembly, supply power (5Vdc) to the product via the DC1 connector (central positive), or by welding two wires to the two pads located between the DC1 connector and the S1 switch (keeping the DC1 connector on the right, the pad on the left is the positive, while the one on the right is negative). If the device does not turn on, check that the slide switch S1 is in the ON position. The S2 button can be used to vary the passage of time.
You might also like